I’d just like to start by saying thank you to the luscious Nigella Lawson for this Roast Banana Cake Buns. Oh no, it’s not her recipe, it’s mine. But without Nigella launching her banana skin curry into the limelight, this recipe would never have seen the light of day!
So why was I baking with banana peels before Nigella made it a thing, well that my dear reader is because I experiment, I experiment a lot. I am pleased to say those experiments rank highly in success rates but roasting whole bananas and adding them to a cake seemed a little, well, a little bit too bonkers.
But I’d done it before you see, take my Roast Orange and Pecan Cake inspired by a trip to Pignoulet in France. The idea of using the whole fruit and nothing but the fruit hasn’t left me since and believe me, there are going to be more roast fruit baking experiments in the near future.
So thank you Nigella, I can now release my Roast Banana Buns into the wild without fear of rejection or little men in white coats coming to take me away.
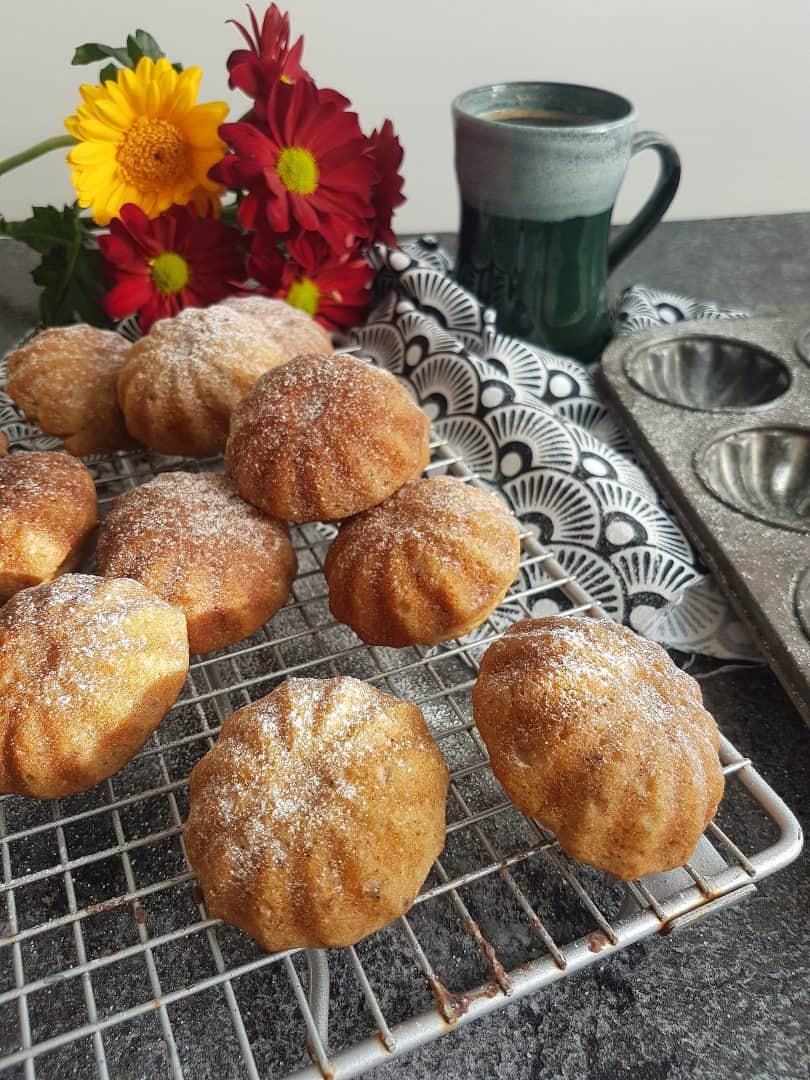
How ripe are the bananas you need to make Roast Banana Cake Buns from scratch?
Green, yellow, yellow with brown spots and brown all over. I’m not a fussy lass, bring whatever banana you have to the table and roast it. The only difference will be the roasting time, the level of sweetness and the amount of nutrition packed into your roasted fruit.
Green Bananas – tougher skin means more cooking time; I would recommend no less than 40mins. It also means a less sweet fruit so if you wish to have a sweeter bun at the end then consider using a little more sugar than suggested in the recipe. A less ripe banana is also higher in nutrients and starch, the latter meaning that it is digested slower (of course roasting it does speed this up though)
Yellow Bananas – these are obviously at their peak of perfection for eating raw, sweet enough not to need extra sugar to that recommended in this bake and packed with nutrients. Roasting these would only need 30mins.
Brown spotted or Brown Bananas – lets face it, these are the ones most likely to go into baking as they’ve passed their best for eating raw. Bananas with yellow peel and brown spots are perfect for this recipe and any other banana-based recipe on my website [see below for other recipe ideas]. I have used totally black bananas too the flavours of the overripe bananas are very deep and can almost revert back to being less sweet and a bit bitter so my personal preference is to use the yellow bananas with black spots. Roasting these ripe banana’s can take 20-25mins.
Can you eat banana skin?
You can actually eat the skin or peel from pretty much any fresh fruits and vegetables, it’s just that we humans choose not to. Often the decision is made not to because peeling the food is the quickest method to eat something fresh and least complicated when it comes to cooking.
One thing to consider when eating any peel, skin or husks is to choose a fruit or vegetable that hasn’t be in contact with pesticides so if you plan to live a low waste life then go organic.
So eating banana skin isn’t bad for you, neither is eating orange peel, or whole parsnips or sweet potato skin it is actually good for you, read on…
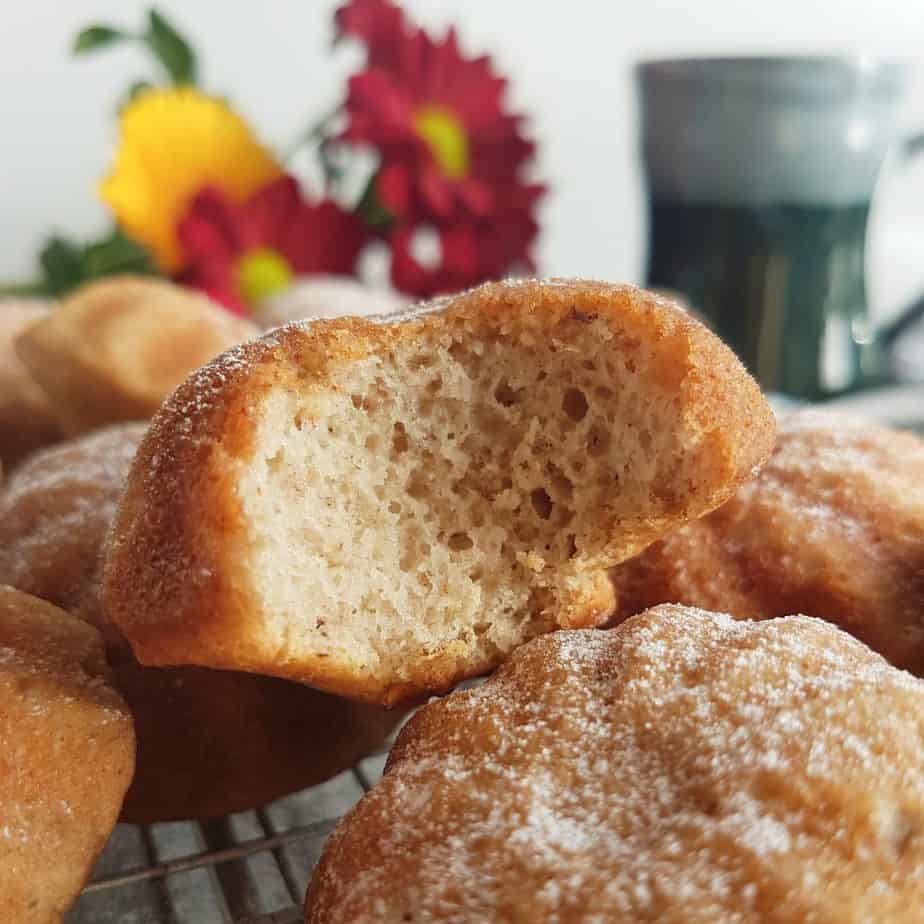
Are there any health benefits to eating banana skin?
Yes, in short there are. According to this item in Healthline.com, ‘banana peels are not only edible but also rich in several key nutrients, including potassium, dietary fiber [fibre], polyunsaturated fats, and essential amino acids’. It goes on to say the peel of a banana ‘makes up about 35% of the ripe fruit [so] using the peel is a great way to reduce food waste while squeezing some extra vitamins and minerals into your diet’.
In another source, and backed up by various other sources, Today.com agrees that bananas are known for their high potassium content, and goes on to say that ‘each medium fruit contain[s] a whopping 422 milligrams [and] the peel contains an additional 78 milligrams of potassium’.
How do you bake a whole banana?
I have tried two methods of roasting: greasing the bananas and roasting in a baking tin and wrapping the bananas in aluminium foil and roasting. This is technically steaming I guess as its cooking in its own juices. I find the latter method gives you a softer skin and retains the moisture necessary to make the bun batter.
The foil parcel method also means that you capture all the jelly-like goodness that comes out of the bananas (this is starch) and the skins are easier to blend in the next stage of the recipe.
I bake on a high heat so 220°C | 200°C fan | 425°F | Gas 7
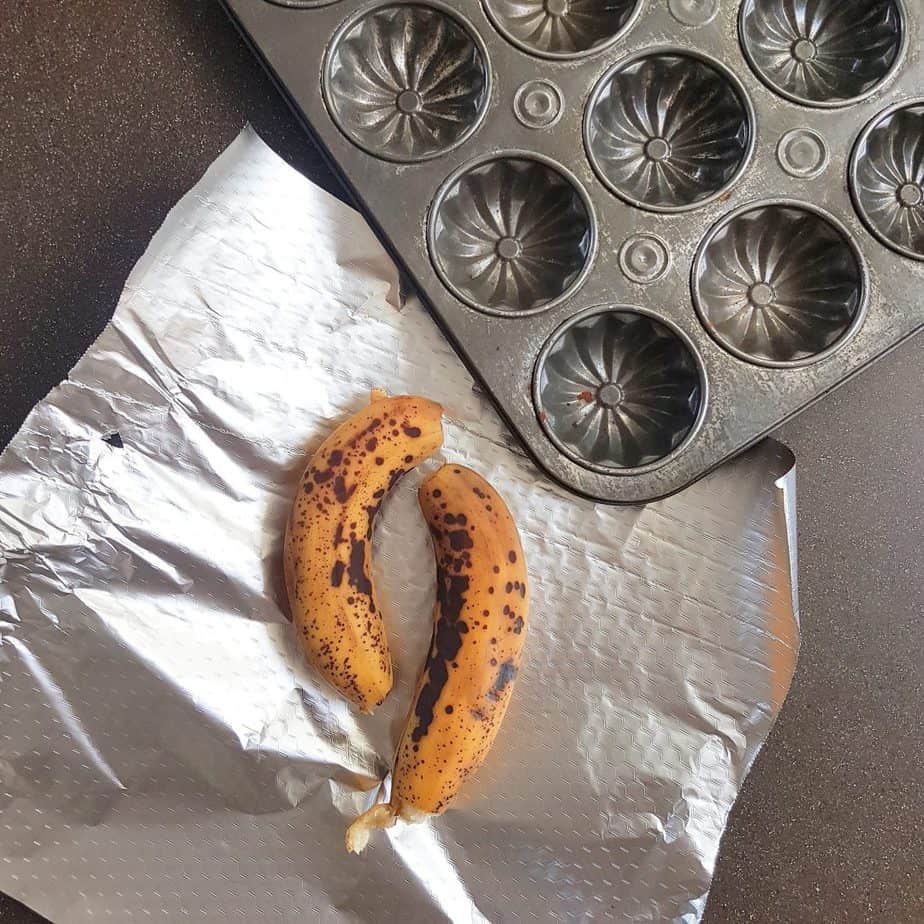
What tin should I use to bake my Roast Banana Buns?
I am extremely fortunate to have an original 1950’s bun tin that I’ve inherited off my darling Gran who passed earlier this year. I have had so many people comment on the tin so I have done a little research for you and sourced a few that I think you may like. Failing this, I recommend using a Madeleine tin, but there’s nothing to stop you from using a jam tart/mince pie tin, you just won’t have a pretty pattern on the top side once the buns are turned out. As with all my links to Amazon they are affiliate links so if you did make a purchase, I get a few pennies at no extra cost to you. I have also managed to track down an online store that sells original vintage bun tins The Vintage Kitchen Store.
Different ways to decorate Roast Banana Cake Buns
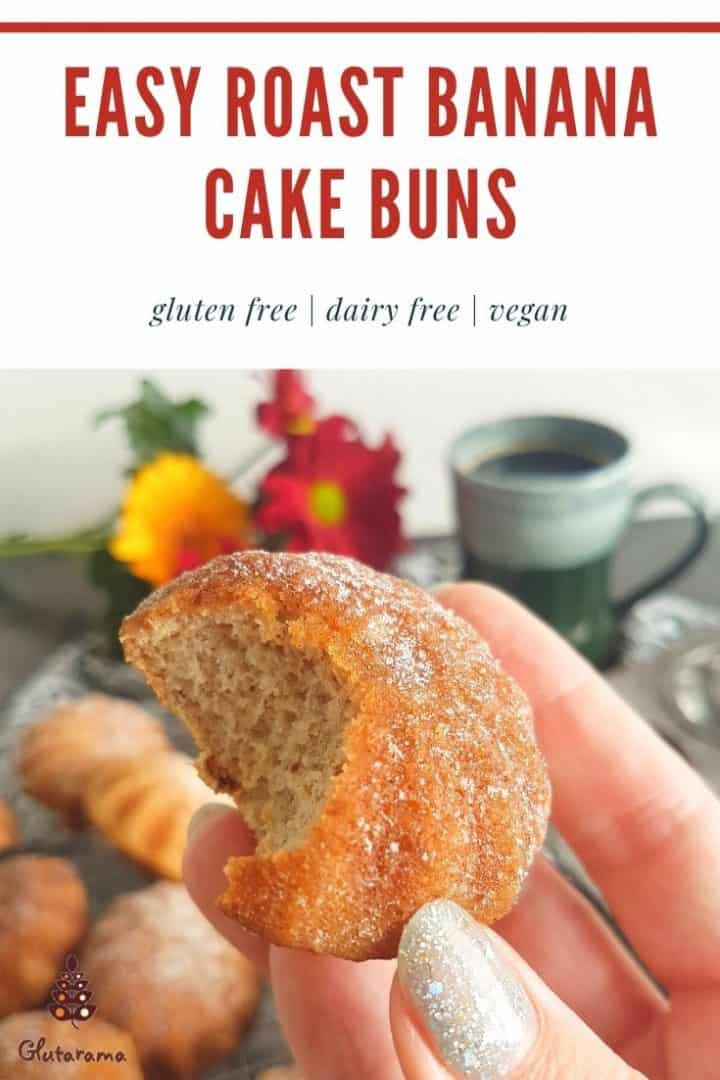
I like to keep things simple so a little icing sugar dusted over the top is perfection in my eyes, however to make these a little more special you could drizzle with white icing, or white chocolate and how about sprinkling some roasted chopped hazelnuts over the chocolate before it sets. These would be a perfect little bite to eat with a coffee when you have friends over for a cuppa and catch up.
How to store these Mini Roast Banana Cake Buns?
I have stored this bake very well in both Tupperware containers and old biscuit tins so I know that these will last for up to 3 days easily, possibly a week if kept in the fridge, but bear in mind it’s got fresh (or not so fresh!) fruit in it. That is of course if this bake lasts that long!
I should also point out that if you store these in Tupperware they may ‘sweat’ a little so if you dusted them with icing sugar this will dissolve, you will also lose the crispy ‘doughnut-style’ texture to the buns surface and end up with a softer moister bun.
I haven’t tried to freeze this recipe yet but I’m positive it will freeze just fine. To bring the bake back to life you will need to defrost at room temperature for over 3hrs, and I would recommend popping it in a hot oven for 5mins to revive the sponge back to its perfect moist/crumble state. The alternative would be to microwave and serve with custard as a pudding…hmm, think I’ll try that next actually.
Other recipes with overripe bananas you may like to try
Bananas are often used as an alternative to eggs in a recipe, therefore many of my recipes with banana in them are eggless banana recipes. Plus, as bananas, especially ripe bananas, are naturally sweet these recipes tend to be healthier in the fact that they use less white or refined sugar and, in many cases, less fat or not fat at all.


Subscribe today!
Sign up to my Friday Newsletter & receive 3 Free Downloads!
- GF & DF e-Book
- Conversion Guide
- 3 Guides to Dietary Needs
Easy Gluten Free Roast Banana Cake Buns Recipe
If you make it and like the recipe I would be eternally grateful if you popped back and commented leaving a star rating as this will tell search engines that this recipe is worth checking out and others will get to find it in searches.
Easy Gluten Free Roast Banana Cake Buns
Ingredients
- 2 banana(s)
- 75 g caster sugar
- 50 g butter I use Flora vegan butter
- 150 ml milk I use soya milk
- 140 g gluten free self raising flour
Instructions
- The first thing you need to do is roast your bananas. To do this I preheat the oven to 220°C | 200°C fan | 425°F | Gas 7. I use a pair of scissors to cut off the hard stalk of each banana then wrap them in a foil parcel, making sure there are no gaps for liquids to leak or steam to escape. Place the parcel onto a baking sheet and bake for 25mins.
- While you roast your bananas heat the 50g of butter (or dairy alternative) in a saucepan and allow to bubble until the butter turns dark brown. This is burnt butter and add to the depth of the buns plus you will need this to prepare your bun tin.
- Allow the burnt butter to cool so it starts to solidify.
- Your banana’s will be cooked now so remove those from the oven and turn the oven down to 200°C | 180°C fan | 400°F | Gas 6
- Unwrap the foil parcel and allow the bananas to cool for 10mins. In the meantime your butter will be cool enough to brush into the bun tin moulds, I use a silicone pastry brush to do this and with two coats, the butter forms a thick layer of protection again the metal tin. This butter also adds a deliciously nutty flavour to the finished bun. Don’t’ discard the left-over butter, you need this for your bun batter.
- Once the bananas are cool enough add them to a blender along with the 150ml of milk (I used soya milk). Blend until smooth with no more bits of banana peel visible.
- Add the caster sugar, the remaining burnt butter, and the self-raising gluten free flour to a bowl and pour in your banana puree, fold until fully incorporated.
- Spoon the banana bun batter into the to bun tin, this makes 12 little buns
- Pop into the oven and bake for 15mins, you want your buns to go a beautiful golden colour, they will rise into little mountain shapes and have a firm bounce to the touch.
- Remove from the oven once baked and turn out to cool, the underside of the buns should be a beautiful deep brown colour thanks to the burnt butter.
- Allow to cool completely before dusting with icing sugar and serve.
Nutrition
Don’t lose this delicious Roast Banana Cake Buns recipe – pin it for later.
Click to find out more about the Free From Food Awards
I love to see your photos of my bakes, dinners and treats. Head to your favourite social media account and don’t forget to tag me in @glutarama so I can see them too!
Click to see gluten free products available on Amazon
Subscribe to my email list so that you get NEW recipes straight in your mailbox every Friday plus 3x FREEBIE’s and access to some amazing gluten free DISCOUNTS
*disclaimer: I use affiliate codes on my website, the vast majority are to Amazon. If you click on any of the links or images in the post and make a purchase my family will benefit from a small % of that purchase at no extra cost to you.
For full transparency, in 2020 I made my first £25, and in 2022 I reached my next £25 (Amazon don’t transfer the money until you reach £25). Recently I got paid a whopping £27.10 for 2023.
So to date I have made £78.58 since I first started the scheme in 2017. It won’t pay the bills, that’s for sure but it does help to pay for ingredients or little treats to cheer me up!



Wow! These look fabulous Rebecca. I’d never think of baking with the whole banana. Such a great idea and they look so spongy. 😋
They really are bouncy light! Quite extraordinary given they are gluten free and vegan!