The inspiration for my Gluten Free Cream Horns came from a bittersweet experienced when my mum and I had to go through my grandparents house and get it ready to put on the market. We did however have a wonderful time going through cupboards and boxes, discovering treasures hidden for years.
I say treasures, we’re not talking the Pirates of the Caribbean shiny kind, no, these are original cookbooks with Grans handwritten notes, retro kitchen gadgets and cookware, biscuit tins and pudding bowls. I wish each one could talk to me and tell me their stories.
Grans Cream Horn Cases
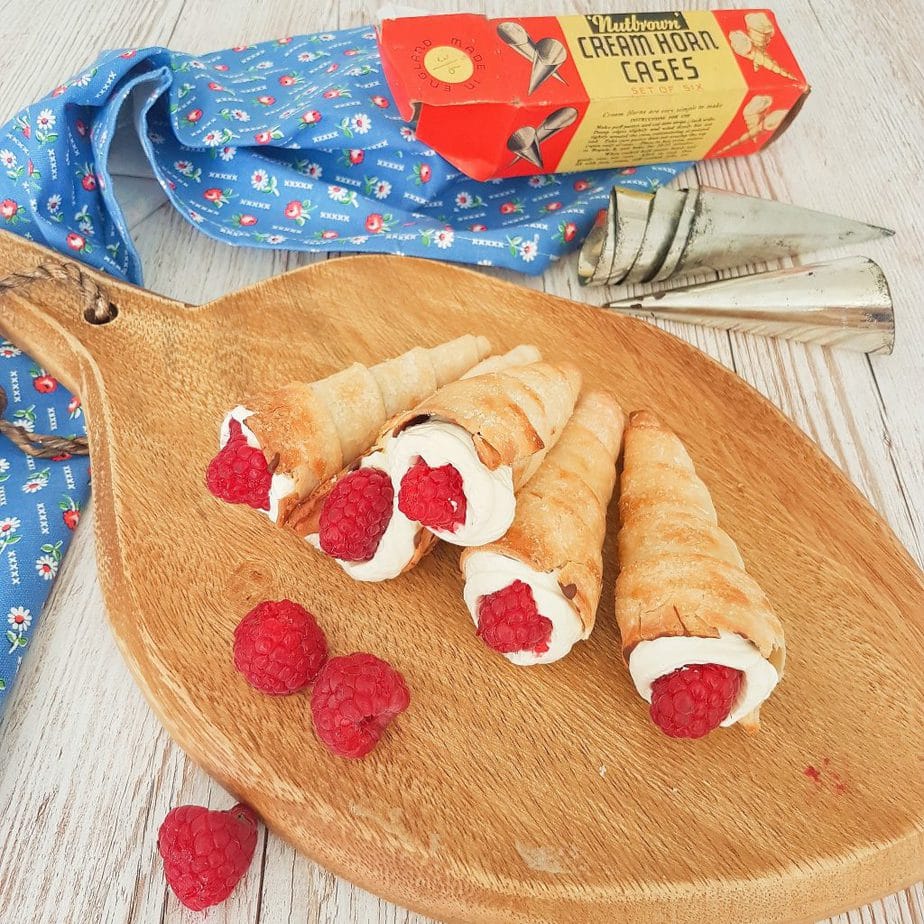
I found Grans cases in their original box with 3/6 written on the side I’ve tried to work out what this would cost in terms of today’s money and I think I’m right in saying this would be about 17p in the UK. I wish I could get kitchen gadgets and cookware at this price still, mind you, I’d have to buy another house to store everything! The brand of the cream horn cases are Nutbrown and you can get an identical vintage fully boxed set on eBay for £17 only a 100% mark up on the original price!
I’ve Googled Nutbrown and found they’re still about and making a few kitchen gadgets, not the cream horn moulds though. However, you can get a new set from Amazon via this link for Cream Horn Cones or via the image link at the bottom of this post
Where did Cream Horns Originate?
Now this did take a bit of research (but I like this kind of thing, I do after all have a Masters in History!) From what I can tell the word cream horn is just a over simplified description of the puff pastry cones. Other names for the cream horn are foam rollers and Schaumrolle. The latter is the Austrian name for the rolls and this is where the sweet pastry treat originated.
Most often the rolls would be filled with cream but its not uncommon to find them filled with marshmallow too. Other variations you will find are puff pastry tubes rather than the familiar cone shape and again these are piped with cream and rolled in sugar.
Different ways to decorate Gluten Free Cream Horns
As you can see here in this this recipe, I have decorated with fresh raspberries and as a super indulgent treat I coated the insides of the cream horn with chocolate. To achieve a chocolate coated cream horn you need a little bit of patience and a stick! I’ll come onto that in the next paragraph.
My son said he loved the addition of the raspberries and suggested adding another one in the tip of the cone as a surprise when you get to the last bite, I have to agree this would be lovely. Other fruits that would work equally as well are blackberries, red currants, blueberries and strawberries (either tiny wild ones or a slice of strawberry.
I have seen cream horn cones dipped in chocolate so that the top of the cone is coated, this may help to prevent your puff pastry going soggy if you plan to keep these for more than a day or are preparing for a party.
As a tip, I’d recommend only brushing and coating the tops of the horns with granulated sugar to get the authentic sugar rolled look. I speak from experience when I say that brushing and coating the whole horn in sugar results in a glue-like caramel and getting your horn off the baking sheet is a stressful situation to find yourself in.
How to coat Gluten Free Cream Horns in chocolate
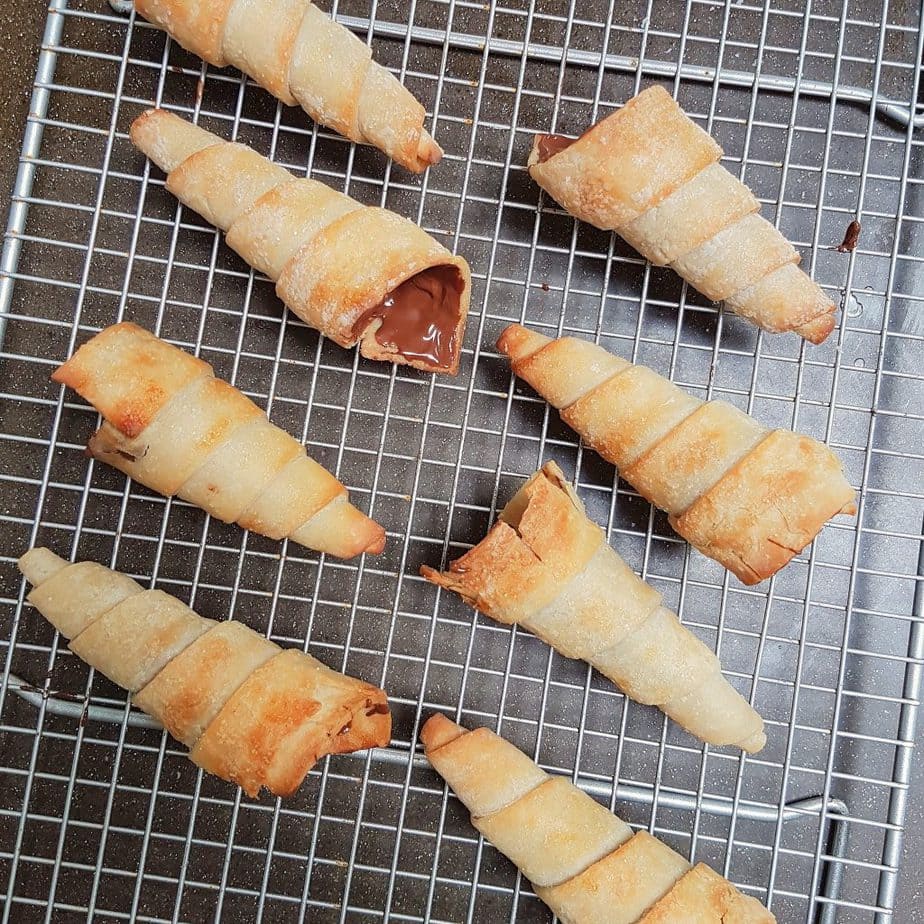
As mentioned above this process is a little bit fiddly but so, so worth it. Simply melt 100g of chocolate; dark of milk work equally as well. Then with a teaspoon, spoon a little chocolate into the cone holding it at a 45° angle. Let the chocolate drip down to the bottom of the inner cone and gently rotate the cone in your fingers to coat the rest of the inner sides. I mentioned a stick above didn’t I? that’s to tease the chocolate into any gaps and dips in the puff pastry. I actually used a metal skewer as opposed to a stick but a cocktail stick would work brilliantly.
Once the cones are all coated pop into the fridge for 10 mins to set the chocolate before piping in your cream.
Can I make Gluten Free Cream Horns dairy free?
I used dairy free chocolate for this recipe because I had planned to eat them myself but then couldn’t be bothered to go social-distance shopping so use the non-dairy free cream to pipe. However, for the chocolate coating I can confirm that as I’ve done this a couple of time now, dairy free chocolate works just fine, using the method above, albeit a little thicker in consistency when melted therefore a tiny bit more awkward to coat the insides so extra teasing into gaps is likely to be required.
To make the cream diary free simply follow the method in the recipe notes using high percentage tinned coconut milk. You can use a soya alternative but the cream struggles to reach piping consistency, so you’ll have to eat them immediately. If you plan on eating them straight away, you could opt for a time saving hack and use a soya squirty cream.
What puff pastry can you use for Cream Horns?
I use Jus-Rol ready rolled puff pastry, but the gluten free version, for my recipes that require a puff. It’s so simple to use being already rolled out and does achieve a decent puff layering. I have not used Genius for reason that it comes in a block and would need rolling but if anyone dose try this recipe using this or a different shop brought puff pastry then I would love to hear how you got on.
Other recipes that are similar to my Gluten Free Cream Horns
I have another puff pastry recipe that have proven very popular, my Danish Treacle Tarts make a great afternoon teatime treat or a rather indulgent breakfast pastry. You can also find my gluten free Chocolate Eclairs piped with fresh cream. Another familiar favourite is this recipe for Pecan Danish Pastries by Becky Excell.
Gluten Free Cream Horns Recipe
Gluten Free Cream Horns
Ingredients
- 1 Jus-Rol Gluten Free Puff
- 100 g milk chocolate
- 150 ml double cream for dairy free version see notes
- 2 tbsp icing/confectioners sugar
- granulated sugar
- 9 raspberries to decorate
Instructions
Puff Pastry Cone
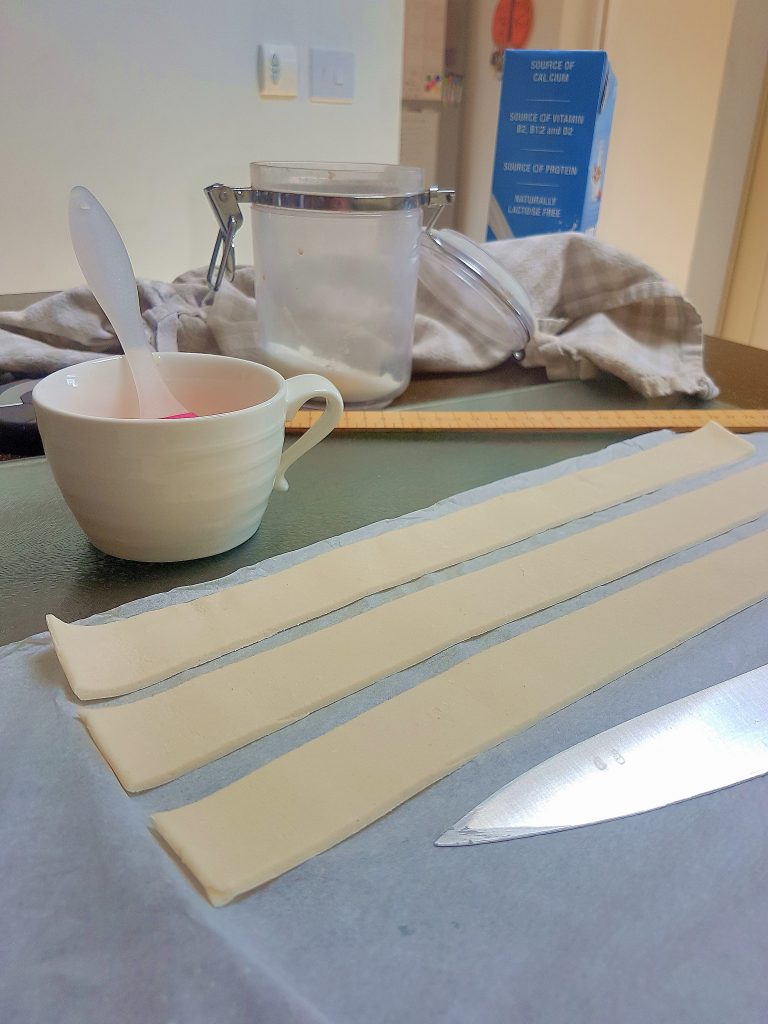
- Using a ruler cut the ready rolled puff pastry into 9 long lengths (along the longer side of your pastry rectangle) Brush the pastry strips with water.
- Take a cream horn cone and spray or brush with oil. Place the point of the cone at the end of a strip of pastry and begin to roll gently away from you. Make sure the pastry overlaps by at least 0.5cm and that the pastry is travelling up the cone.
- Top Tip: do not let the pastry go further than the end of the cone as you will struggle to get the cone out after baking.
- Place on a lined baking sheet with the end of the pastry facing down.
- Repeat with remaining moulds (you normally get 6 in a pack)
- Once all cone moulds are covered in rolled pastry brush the tops with water and sprinkle granulated sugar over the tops.
- Place in a preheated oven at 200°C | 180°C fan and bake for 10-12 minutes keep an eye on the pastry as it can brown quite quickly.
- Once baked place on a cooling rack for 5 minutes and then carefully tease the mould out of the pastry cone. It should come out without too much of a fight if you’ve oiled the cones well enough. Be careful, the metal moulds may still be quite hot to the touch.
- Allow moulds to cool and repeat steps 2-4 with remaining 3 strips of pastry. Remember to re-oil the moulds before rolling your pastry up.
Chocolate Coating
- Melt the chocolate in the microwave or in a bowl over a basin of hot water. Take a teaspoon of chocolate and spoon a little chocolate into the cone holding it at a 45° angle.
- Let the chocolate drip down to the bottom of the inner cone and gently rotate the cone in your fingers to coat the rest of the inner sides.
- Using a cocktail stick or skewer, tease the chocolate into any gaps and dips in the puff pastry.
- Once the cones are all coated pop into the fridge for 10 mins to set the chocolate before piping in your cream.
Cream Filling
- Whip the double cream and 2tbsp icing sugar until you reach a semi-firm piping consistency.
- Using a piping bag and nozzle of your choice pipe cream into each horn until it stands proud of the pastry cone.
- To decorate simply choose a fruit, grated chocolate, sprinkles or keep the cone plain.
Notes
- 1 tin coconut milk – make sure you get milk that is 70% or more coconut milk
- 1 tbsp set or cloudy honey (or maple if vegan)
- ½ tsp vanilla extract
Nutrition
Click to find out more about the Free From Food Awards
I love to see your photos of my bakes, dinners and treats. Head to your favourite social media account and don’t forget to tag me in @glutarama so I can see them too!
Click to see gluten free products available on Amazon
Subscribe to my email list so that you get NEW recipes straight in your mailbox every Friday plus 3x FREEBIE’s and access to some amazing gluten free DISCOUNTS

disclaimer: I’ve started using affiliate codes on my website again (needs must). If you click on any of the links in the post and make a purchase my family will benefit from a small % of that purchase at no extra cost to you.




Leave a Reply