This page contain affiliate links. Please refer to my Disclosures Page for more details.
STOP! Before you hit ‘Jump to Recipe’ check ‘Skip to the Good Bit‘ below. I may answer a query you have about this recipe.
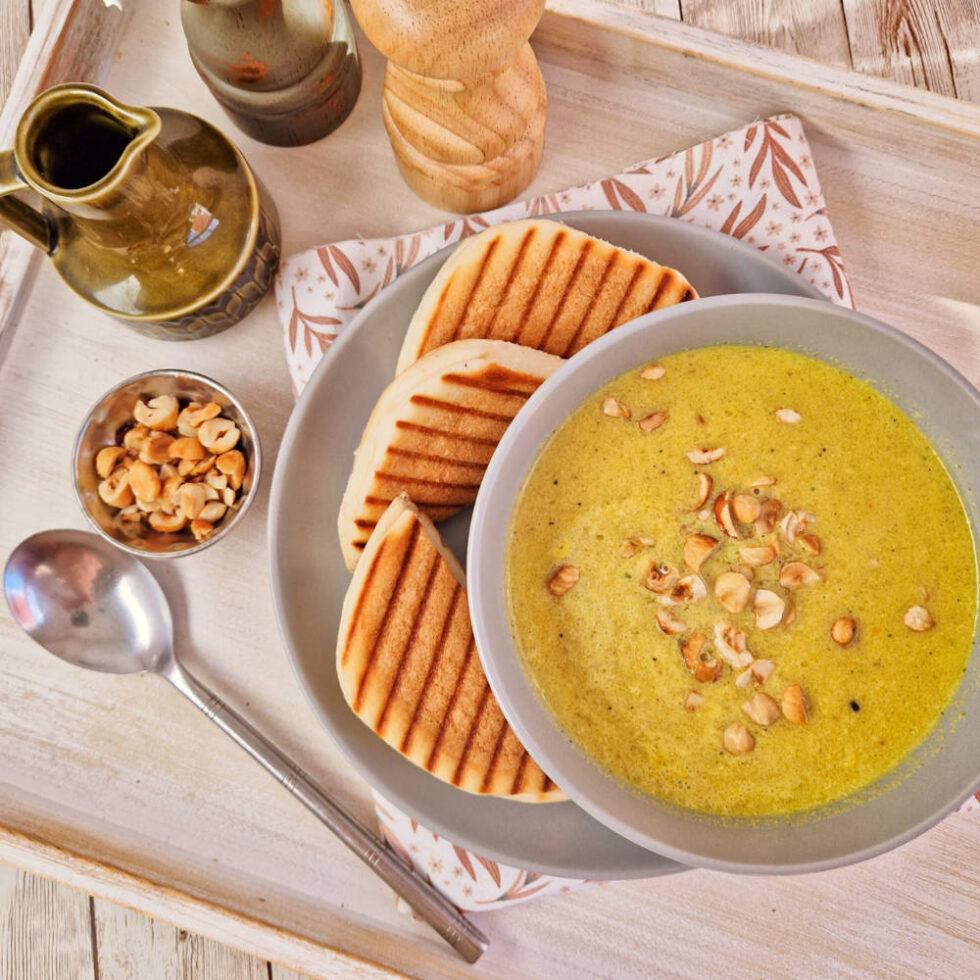
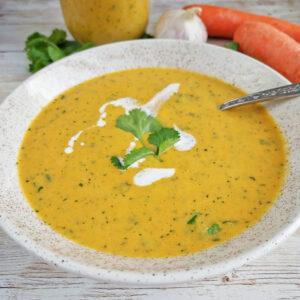
This naturally gluten free Creamy Curry Soup Recipe is a bit of a winner. It’s not spicy but has all the warmth and fragrance of a mild curry. It also has a mildly coconutty flavour on account of the sweet root vegetables I use so this is an excellent recipe for children too.
Skip to the good bit
- How do you prepare the vegetables for this soup?
- Like your creamy curry soup extra spicy? Try this
- Not a fan of cream? Try this
- The perfect topping for this creamy curry soup
- Batch cook this soup to save money
- How to save even more money and microwave your vegetables
- How to store your fresh soup when batch cooking
- Other soup recipe ideas
- Creamy Curry Soup Recipe

Subscribe today!
Sign up to my Friday Newsletter & receive 3 Free Downloads!
- GF & DF e-Book
- Conversion Guide
- 3 Guides to Dietary Needs
How do you prepare the vegetables for this soup?
I see no point to peeling a parsnip. You may have a different opinion, but if the parsnip is clean then keep the skin on. There’s way more fibre and goodness in those skins and they add to the natural sweetness too, making this a much more kiddie-friendly soup.
I simply top and tail each parsnip (remove the end root and the head of the vegetable). Then, depending on the size of your parsnip I cut straight down the middle into halves or again into quarters.
This isn’t a beauty contest, these parsnips are destined to be roasted and then blitzed into puree for soup so no need to seek perfection.
Now swede, that’s a different ball game. Swede skins are rather tough and fibrous and not great to add to your soups so I recommend peeling the swede before chopping it and roasting it.
All that’s left to do is place the parsnips, swede and roughly chopped onion onto a baking sheet or in a roasting tin, drizzle with your preferred oil (I use olive oil) and season with salt and pepper. Then pop them into the oven to roast until golden, sweet and soft in the middle.


Like your creamy curry soup extra spicy? Try this
So, in this recipe I have use garam masala which can easily be sourced in local supermarkets. Just keep an eye on labels and check for any may contains. I find that the cheaper larger bags of Indian ingredients tend to have may contains on them. This is a shame as these ingredients tend to be cheaper in the ‘World Food’ aisles.
You are totally in control of your soups destiny here. If you’re worried it may be too fragrant, then only add half the recommended amount of spice to the stock. Then add a bit more later when you’ve blended the the soup and can give it a taste test.
If you are a fan of the hot and spicy variety of curries, then maybe add a bit of fresh or dried chilli too to heat things up a bit. The garam masala is never intended to be a hot spice, simply fragrant so if you want a kick you’ll need to look elsewhere to achieve this.

Not a fan of cream? Try this
As this recipe was for me also, I made sure I used a dairy free cream. Soya cream is just fine and comes in handy 250g cartons.
If the idea of a creamy curry soup is not up your street then you could add milk instead or simply top up with 250ml more water. The soup will still have a creamy look by nature but without the overly-creamy taste.
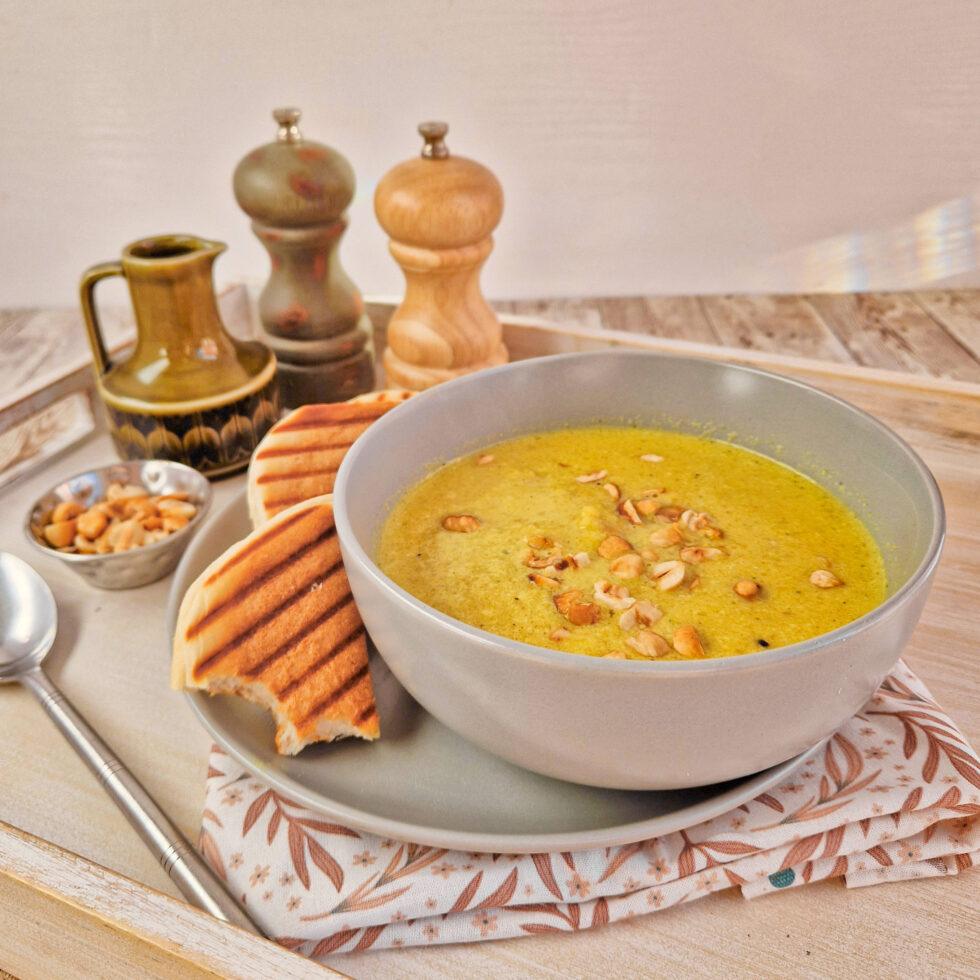
The perfect topping for this creamy curry soup
Croutons are the go-to topping for soups but something just doesn’t feel right about throwing a load of bread cubes (gluten free or not) onto a creamy curry soup.
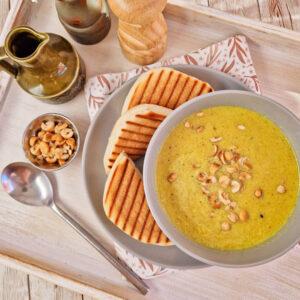
Instead, I love the idea of toasted nuts. These add a delicious roasted flavour to each spoonful and an exciting crunch too.
I simply toast the hazelnuts under the grill for 5+ minutes keeping a close eye on them, you could fry them in a dry frying pan instead. Then I roughly chop them up and sprinkle over the served soup.
Other similar toppings are toasted whole almond, prepared in the same manner or how about toasted mixed seeds such as pumpkin, sunflower and sesame seeds?
Batch cook this soup to save money
Of all my homemade soup recipes, this is by far the most expensive due to adding cream, additional vegetables and a bit of a luxury topping in the form of hazelnuts.
However, we can all agree that buying in bulk and cooking in batches is much more cost effective right? This is because bigger bags of fresh vegetables are cheaper. Also, firing up the oven just once to cook the vegetables is cheaper than remaking the whole recipe on another day from scratch.
The act of reheating soup is way more cost effective and using a microwave if you have one is considerably less in energy bills.
Did you say ‘Poppycock’! Don’t take my word for it, this really handy energy calculator is mildly addictive and comes in really handy when I’m invoicing people for recipe development. You do need to know a few things about your personal energy use first but once you know those factors you can work out how much it costs you to heat up a tin of beans to roasting a Sunday dinner to warming up your cold tea!
How much does it cost?
To make this Creamy Curry Soup I’ve worked out the cost using basic (non-organic) ingredients. If you buy in bulk, this price will go down. The energy costs are based on the current energy rates in the last quarter of 2022 with a capped rate of 0.52per kWh
250g Parsnips – 0.35p
250g Swede – 0.35p
1 Onion – 0.15p
1 Knorr Stock Pot – 0.30p (based on a pack of 8 pots)
Flavourings (garlic, garam masala, turmeric) – 0.25p
250g Cream – £1.20
25g Hazelnuts – 0.50p
£3.10 for two large servings (£1.55p per serving)
To roast vegetables in the oven it costs between 0.42-0.62p (max. £1.86 per serving)
To steam the vegetables in a microwave it costs between 0.18-0.28p (max. £1.69 per serving)
How to save even more money and microwave your vegetables
How to microwave vegetables
One way to microwave vegetables is to invest in a microwave steamer they’re easy to clean, have an integrated steam basket and the one linked holds vegetables for two people. They come with full instructions on how to use and what you can cook in them.
If you don’t like the idea of a plastic microwave steamer then you can make your own with a microwave-proof dish (I’ve used my glass Pyrex Casserole Dishes with lids in the past) then cover with microwavable plastic wrap or (and this is better for the environment) use a lid or upturned plate.
To arrange the veggies, simply prepare them as you would if using a conventional steamer, then arrange them in the microwave dish making sure there are plenty of gaps for the steam to travel around them.
Next add 1-2 tablespoons of water, that’s it – the vegetables will already be wet after you’ve rinsed them.
Heat on full power for 2-4 minutes depending on how hard your vegetables are*.
TOP TIP: heat for 30 seconds at a time and keep checking. Eventually you will know exactly how long different type of vegetables take to cook and become a microwave steaming pro!
* absolutely no point in me giving you exact times as everyone’s microwaves are different powers, mine is 900w for example, yours may be 700 or 800w.

How to store your fresh soup when batch cooking
When batch cooking, you not only save energy by only cooking the recipe once, but you also give yourself quick and easy lunches and dinner for the rest of the week or the following week for that matter.
I explain how to sterilise portion sized jar below but you can also ladle the soup into Tupperware containers to keep in the fridge. Note that if using Tupperware the shelf life of the soup will only be 4-5 days as you will not have gone through the sterilisation process first.
How to sterilise jars for your individual soup portions
Wash your jars* and the lids in hot soapy water, but do not dry them. Instead, leave them to stand upside down on a roasting tray while they’re still wet.
Pop the tray of clean, wet jars and lids in to a preheated oven at 160-180ºC for about 15 mins.
Using a funnel pour your soup into the jars. Be very careful not to touch or get any of the mixture onto the rim of the jars as this could introduce bacteria.
Ideally you want to fill the jars not quite to the top, leave about 1/4 inch (1/2 cm) gap at the top between the soup and the lid.
While everything is still hot, secure the lids tightly.
Once in sterilised jars like this your soups should keep for about 1 month in the fridge probably longer.
*you could easily use 500g jam or cooking sauce jars
Other soup recipe ideas

For a full soup recipe collection and top tips on how to; make free from soups from scratch, thicken soup, source gluten free stock cubes and more head over to my Delicious Free From Homemade Soup Recipe Collection
Creamy Curry Soup Recipe
If you make it and like the recipe I would be eternally grateful if you popped back and commented leaving a star rating as this will tell search engines that this recipe is worth checking out and others will get to find it in searches.
Creamy Curry Soup
Equipment
- 500 ml glass jug or more if making a large batch for later
Ingredients
For the roast vegetables
- 250 g parsnips (about two medium parsnips) halved or quartered
- 250 g swede (about 1/3 of an average sized swede) peeled and diced
- 1 medium onion
- 2 tbsp olive oil enough to drizzle over parsnips to roast
For the stock
- 1 vegetable stock cube
- 1 tbsp garam masala or mild curry powder
- ½ tsp ground turmeric optional but adds amazing colour
- 750 ml boiled water
- 1 garlic (powder, puree or clove)
- salt & pepper to taste
For the cream
- 250 ml soya cream or usual dairy free alternative you can use normal cream if this is not an issue
For the topping
- 25 g whole hazelnuts
Instructions
- Pop the chopped parsnips, swede and onion in a roasting tin with some olive oil and seasoning and roast for 50 mins at 220°C | 200°C fan | 425°F | Gas 7.
- Make your vegetable stock by adding 750ml of boiling water. Then add the garam masala, garlic, turmeric and seasoning.
- Once roasted, place the roasted vegetables, prepared vegetable stock and seasoning in a blender and pulse until smooth, take care with this step as the ingredients will be jolly hot! (instead, I add mine to a large saucepan and use my hand blender).
- If not already, transfer to a large saucepan and reheat, adding the cream at the final stages of heating.
- Serve immediately with a crusty gluten free roll.
- If keeping for later, pour into a suitable jar/container and seal immediately. Allow to cool before popping in the fridge.
Notes
Nutrition
Click to find out more about the Free From Food Awards
I love to see your photos of my bakes, dinners and treats. Head to your favourite social media account and don’t forget to tag me in @glutarama so I can see them too!
Click to see gluten free products available on Amazon
Subscribe to my email list so that you get NEW recipes straight in your mailbox every Friday plus 3x FREEBIE’s and access to some amazing gluten free DISCOUNTS


Join my friendly Facebook Group
life’s a drama, gluten free doesn’t have to be….
*disclaimer: I use affiliate codes on my website, the vast majority are to Amazon. If you click on any of the links or images in the post and make a purchase my family will benefit from a small % of that purchase at no extra cost to you.
For full transparency, in 2020 I made my first £25, and in 2022 I reached my next £25 (Amazon don’t transfer the money until you reach £25). Recently I got paid a whopping £27.10 for 2023.
So to date I have made £78.58 since I first started the scheme in 2017. It won’t pay the bills, that’s for sure but it does help to pay for ingredients or little treats to cheer me up!




Leave a Reply