This page contain affiliate links. Please refer to my Disclosures Page for more details.
STOP! Before you hit ‘Jump to Recipe’ check ‘Skip to the Good Bit‘ below. I may answer a query you have about this recipe.
This post is everything you need for Perfect Pumpkin Puree. How to make it, how to store it and the exciting bit, what to do with it!


Subscribe today!
Sign up to my Friday Newsletter & receive 3 Free Downloads!
- GF & DF e-Book
- Conversion Guide
- 3 Guides to Dietary Needs
Skip to the good bit
- How to choose the right pumpkin for pumpkin puree
- Can I use other squashes for pumpkin puree?
- Different methods to make pumpkin puree
- The best way to make pumpkin puree?
- The best way to make pumpkin puree – part two
- Want to save some time?
- How to store pumpkin puree?
- What can I make with pumpkin?
- How to make pumpkin spice
- Perfect Pumpkin Puree Recipe
How to choose the right pumpkin for pumpkin puree
There is no exact science to this, you never really know what your pumpkin will look like until you get it home and cut it in half. But basically you need to follow these simple key points for choosing the best pumpkin for pumpkin puree;
- Avoid huge carving pumpkins, these have been grown specifically for their size and carving quality, not excellent pumpkin flesh and lots of it! (this said, I never waste carved pumpkin shavings)
- Remember that pumpkins are a member of the vast squash/gourd family and therefore you can get similar if not identical outcomes with squashes that seem hard as bullets and the size of a bowling ball or smaller.
- Knock three times (okay, not specifically three!) If you knock on a pumpkin and it sounds woody and hollow, it probably is. you want a deep sound in response to your knock.
Can I use other squashes for pumpkin puree?
Butternut squash can also be used if, like some, you find pumpkin too over-powering in flavour. You may find the creamy buttery flavour of a butternut more appealing with the traditional pumpkin spices.
For this particular batch of pumpkin puree I actually had two homegrown squashes. A beautiful pumpkin grown by my son Lewis and a butternut squash grown by my sisters father-in-law.
In the next paragraph you’ll see just how rich in colour the butternut is com[pared to the pumpkin flesh. I’ll let you into a little secret now. Many canned pumpkin purees actually combine pumpkin and butternut for this exact reason – to get a richer warmer orange colour.

Different methods to make pumpkin puree
There are a few different ways to make homemade pumpkin puree from scratch, this extract from my post for Simple Gluten Free Pumpkin Pie lists the four main ones.
Ways to prepare a pumpkin for baking
Roast pumpkin; cut the pumpkin into ¼ and de-seed, place in a roasting tray and cover with foil, bake at 200°C | 180°C Fan | 400°F | Gas 6 for at least 60 mins (depending on size of pumpkin). Remove and cool, once cooled scoop out the cooked soft flesh and use immediately or freeze for later.
Boiled pumpkin; peel and cut the pumpkin removing all seeds. Chop and add to a big pan of water, boil until tender. Drain pumpkin and leave over the sink to ensure all excess liquids run away. Pop into a blender and puree, as above use or freeze.
Steamed pumpkin; as above really but you steam it!
Microwaved pumpkin; Not tried this but I have it on good authority that you can peel and cut the pumpkin and microwave in a glass bowl with a drop of water.
The best way to make pumpkin puree?
My favourite method, the one I share with you in this recipe, is by no means the quickest. Sadly it is also not the cheapest in terms of energy as you need to roast the pumpkin first. Once you’ve scooped out all the pumpkin flesh and blended it, you then need to condense it further on the hob or back in the oven. More time and more energy. However, in my opinion you get the best results by far.
Best in terms of colour, best in terms of flavour and finally best in terms of consistency.
STEP ONE: carefully cut your pumpkin/squash into crescent pieces. No need to remove the inner webbing or seeds. Place in a large roasting tin (or two if your making a big batch). No need to oil or season.
STEP TWO: cover the roasting tin(s) with aluminium foil, this will cook the pumpkin evenly and prevent it from caramelising too much. Bake in a hot oven for 45 minutes.
STEP THREE: remove the foil cover(s) to expose the baked pumpkin, now place back in the oven for a finally 15 minutes to roast.
STEP FOUR: remove from oven and leave to cool completely before you handle it and remove the flesh.
The next section (The best way to make pumpkin puree – part two) explains how you achieve a smooth, thick puree consistency whilst enhancing the sweet/savoury flavours.


The best way to make pumpkin puree – part two
If you followed the previous steps 1-4 you will now have cooled roasted pumpkin and or squashes. The next stage is to turn this into your pumpkin puree.
STEP FIVE: scoop the flesh out of the skins with a large spoon. This bit is easy as the flesh comes away from the skin with no hesitation. Add the flesh to a large bowl or straight into a large saucepan or casserole pot. There will be sweet pumpkin juices in the bottom of the roasting tin(s) add this too, it’s packed with flavour.
STEP SIX: blitz you pumpkin into a puree, I use my hand blender. Of course, if you have a liquidiser then feel free to use this but you may need to do it in batches if you have lots of pumpkin to blend.
STEP SEVEN: now pop the pureed pumpkin into the saucepan/casserole pot if it’s not already in there and heat gently for about 30mins on the hob or add the lid and cooking in the oven for 1hour or you could do this last bit in the slow cooker with the lid off. The idea is that you want to reduce the puree to thicken it and intensify the flavour and colour.
- hob method – 30 minutes gentle heat, keep lid on but ajar to prevent sploshes but let steam escape.
- oven method – 60 minutes medium heat, keep lid on casserole pot to prevent burning.
- slow cooker method – high heat, 60 minutes minus the lid to allow steam to escape.


Want to save some time?
If the method above seem a bit too long and arduous then how about cutting out 30-60 minutes of pot watching and drain the pumpkin instead. This reduces the pumpkin flavour intensity (for some that may be a good thing) but you still end up with a gorgeous pumpkin puree and not a sloppy wet puree!
So how do you do it? Simple – pour the blitzed pumpkin into a muslin lined colander and leave to drain over the sink for a hour. no need to keep an eye, you could even cover with a tea towel and leave over night. The longer you leave it the thicker the pumpkin puree.
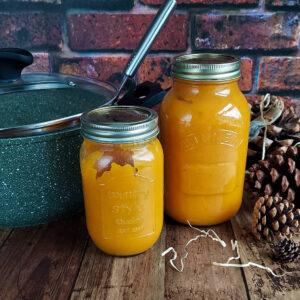
Once finished, simply decant into a large Kilner Jar and keep in the fridge until you need it (or add to Tupperware and freeze).

How to store pumpkin puree?
The direction below on how to sterilise a jar properly refers to soups but this same rules apply to any foods you plan to store in jars. I do this for the cinnamon apple sauce that I make to use in my Gluten Free Apple Caramel Squares and these Easy Gluten Free Apple Turnovers. It means any apple sauce I have leftover can be stored in the fridge for up to a month.
The same applies to this pumpkin puree. However, instead of using 500ml jars I use the larger 1litre jars. This recipe makes 1 to 2 one litre jars depending on the size of your pumpkin/squashes.
How to sterilise jars for your individual soup portions
Wash your jars* and the lids in hot soapy water, but do not dry them. Instead, leave them to stand upside down on a roasting tray while they’re still wet.
Pop the tray of clean, wet jars and lids in to a preheated oven at 160-180ºC for about 15 mins.
Using a funnel pour your soup into the jars. Be very careful not to touch or get any of the mixture onto the rim of the jars as this could introduce bacteria.
Ideally you want to fill the jars not quite to the top, leave about 1/4 inch (1/2 cm) gap at the top between the soup and the lid.
While everything is still hot, secure the lids tightly.
Once in sterilised jars like this your soups should keep for about 1 month in the fridge probably longer.
*you could easily use 500g jam or cooking sauce jars
Another way to store your pumpkin puree is to decant it into Tupperware and freeze it. I find the rectangular plastic take-away tubs are the perfect size for this as one tub is approximately 250-300g which is what is most commonly required for many of my pumpkin recipes here on Glutarama.
These freeze for 3-6mths and to use you simply need to remove from the freeze and defrost at room temperature for 1-2hrs.
What can I make with pumpkin?
No bake pumpkin recipes


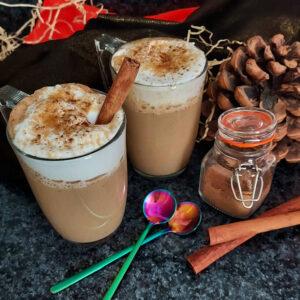
Savoury pumpkin recipes
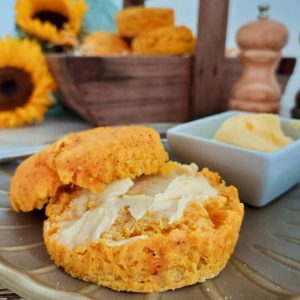
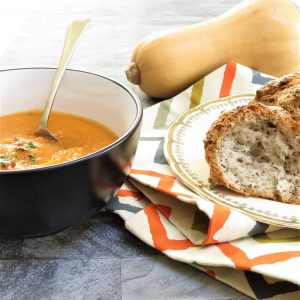
Baked pumpkin recipes


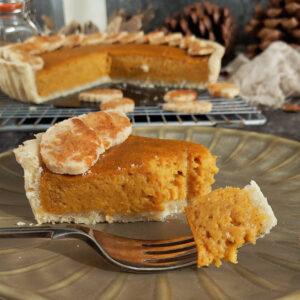
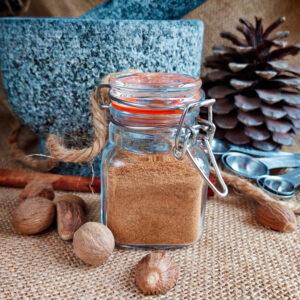
How to make pumpkin spice
Perfect Pumpkin Puree Recipe
If you make it and like the recipe I would be eternally grateful if you popped back and commented leaving a star rating as this will tell search engines that this recipe is worth checking out and others will get to find it in searches.
Perfect Pumpkin Puree
Equipment
Ingredients
- 1 medium pumpkin
Instructions
- Carefully cut your pumpkin/squash into crescent pieces. No need to remove the inner webbing or seeds. Place in a large roasting tin (or two if your making a big batch). No need to oil or season.
- Cover the roasting tin(s) with aluminium foil, this will cook the pumpkin evenly and prevent it from caramelising too much. Bake in a hot oven for 45 minutes.
- Remove the foil cover(s) to expose the baked pumpkin, now place back in the oven for a finally 15 minutes to roast.
- Remove from oven and leave to cool completely before you handle it and remove the flesh.
- Scoop the flesh out of the skins with a large spoon. This bit is easy as the flesh comes away from the skin with no hesitation. Add the flesh to a large bowl or straight into a large saucepan or casserole pot. There will be sweet pumpkin juices in the bottom of the roasting tin(s) add this too, it’s packed with flavour.
- Blitz you pumpkin into a puree, I use my hand blender. Of course, if you have a liquidiser then feel free to use this but you may need to do it in batches if you have lots of pumpkin to blend.
- Now pop the pureed pumpkin into the saucepan/casserole pot if it’s not already in there and heat gently for about 30mins on the hob or add the lid and cooking in the oven for 1hour or you could do this last bit in the slow cooker with the lid off. The idea is that you want to reduce the puree to thicken it and intensify the flavour and colour.
- All that remains now is to allow the puree to cool slightly before adding to sterilised jars or Tupperware and cool completely before popping in the fridge or freezer (for the Tupperware option).
Notes
- hob method – 30 minutes gentle heat, keep lid on but ajar to prevent sploshes but let steam escape.
- oven method – 60 minutes medium heat, keep lid on casserole pot to prevent burning.
- slow cooker method – high heat, 60 minutes minus the lid to allow steam to escape.
Nutrition
Click to find out more about the Free From Food Awards
I love to see your photos of my bakes, dinners and treats. Head to your favourite social media account and don’t forget to tag me in @glutarama so I can see them too!
Click to see gluten free products available on Amazon
Subscribe to my email list so that you get NEW recipes straight in your mailbox every Friday plus 3x FREEBIE’s and access to some amazing gluten free DISCOUNTS


Join my friendly Facebook Group
life’s a drama, gluten free doesn’t have to be….





Leave a Reply